


Overview
When using Jest as the framework for your test, it's often desired to have a report that summarises the test result neatly. Although Jest comes with a default test reporter, which prints out the report in the console directly, one could wish to have a discrete report, e.g as an XML or HTML, that can be stored and shared among team members.
This article covers the usage of a test reporter within Jest framework. Particularly, we will set up the jest-junit, jest-html-reporter, and jest-html-reporters.
Requirements
askui Library (follow this tutorial)
Jest (should be set up after following the above tutorial)
For the demonstration, we will use the website Authentication Test as an automation target.
1. Prepare the askui Test Suite within Jest
Let's say that, we want to use the askui Library to automate the login procedure in the example website.
Go to the example website in your web browser, and run the code provided below to automate the login:
describe('Login',()=>{
  xit('annotates', async ()=>{
    await aui.annotateInteractively();
  });
  describe('Simple Form',()=>{

    it('should click the button',async ()=>{
      await aui.moveMouseTo().button().contains().text().withText('Simple Form Auth').exec();

      await aui.mouseLeftClick().exec(); // This first click is to get the focus on the test app
      await aui.mouseLeftClick().exec(); // Thereafter, we click the button
    });

    it('should type in the email address',async ()=>{
      await aui.typeIn('simpleForm@authenticationtest.com').textfield().contains().text().withText('E-mail Address').exec();
    });

    it('should type in the password',async ()=>{
      await aui.typeIn('pa$$wOrd').textfield().contains().text().withText('Password').exec();
    });

    it('should click the login button',async ()=>{
      await aui.click().button().contains().text().withText('Log In').exec();
    });
  });
});
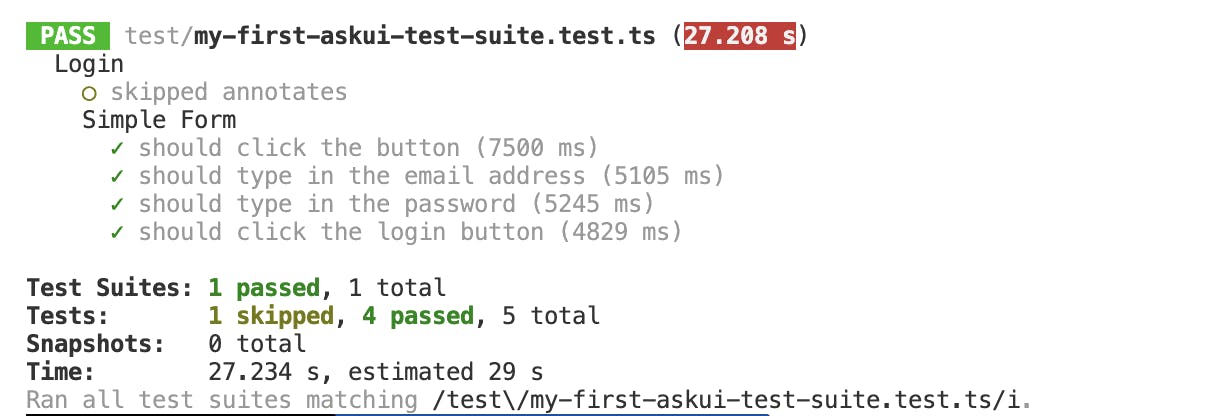
If the test has run successfully, then you will see the default test report printed on your console:
Now let's try to use reporters other than the default one.
2.1. Using jest-junit with askui
jest-junit is an npm library that creates an XML report file per test run in the format of the JUnit XML Report that can be understood by other development automation tools such as Jenkins JUnit plugin. As JUnit is one of those unit test frameworks which were initially used by many Java applications as a Unit test framework, jest-junit reporter facilitates a smooth integration of your test suite.
Run this command to install the reporter within your project root directory:
npm i jest-junit
Then, go to test/jest.config.ts and change it as below:
import type { Config } from '@jest/types';

const config: Config.InitialOptions = {
  preset: 'ts-jest',
  testEnvironment: 'node',
  setupFilesAfterEnv: ['./helper/jest.setup.ts'],
  sandboxInjectedGlobals: [
    'Math',
  ],
  reporters: [
    "default",
    "jest-junit",
  ],
};

export default config;
And run the test suite again:
npx jest test/my-first-askui-test-suite.test.ts --config ./test/jest.config.ts
By default, jest-junit will save the .xml report in your project root directory, with the file name junit.xml:
<?xml version="1.0" encoding="UTF-8"?>
<testsuites name="jest tests" tests="5" failures="0" errors="0" time="28.265">
  <testsuite name="Login" errors="0" failures="0" skipped="1" timestamp="2023-01-15T17:33:04" time="28.24" tests="5">
    <testcase classname="Login annotates" name="Login annotates" time="0">
      <skipped/>
    </testcase>
    <testcase classname="Login Simple Form should click the button" name="Login Simple Form should click the button" time="7.597">
    </testcase>
    <testcase classname="Login Simple Form should type in the email address" name="Login Simple Form should type in the email address" time="5.468">
    </testcase>
    <testcase classname="Login Simple Form should type in the password" name="Login Simple Form should type in the password" time="5.356">
    </testcase>
    <testcase classname="Login Simple Form should click the login button" name="Login Simple Form should click the login button" time="4.937">
    </testcase>
  </testsuite>
</testsuites>
The jest-junit can be configured to format the resulting .xml. Try to change the test/jest.config.ts, and run the test again:
import type { Config } from '@jest/types';

const config: Config.InitialOptions = {
  preset: 'ts-jest',
  testEnvironment: 'node',
  setupFilesAfterEnv: ['./helper/jest.setup.ts'],
  sandboxInjectedGlobals: [
    'Math',
  ],
  reporters: [
    "default",
    ['jest-junit',{
      "suiteName": "login test suite",
      "outputDirectory": "reports",
      "outputName": "login-test",
      "uniqueOutputName":"true",
      "ancestorSeparator": " › "
    }]
  ],
};

export default config;
To see more options for the configuration, please refer to the official README of jest-junit.
2.2. Using jest-html-reporter with askui
If we want to have a report that is more friendly and readable than XML, then we could give jest-html-reporter a try. This reporter generates an HTML file that, if opened in a web browser, visualizes the test result in a human-friendly way.
Run the command below to install the jest-html-reporter:
npm i jest-html-reporter
Then, go to test/jest.config.ts and change it as below:
import type { Config } from '@jest/types';

const config: Config.InitialOptions = {
  preset: 'ts-jest',
  testEnvironment: 'node',
  setupFilesAfterEnv: ['./helper/jest.setup.ts'],
  sandboxInjectedGlobals: [
    'Math',
  ],
  reporters: [
    "default", [
      "jest-html-reporter", {
        "outputPath": "./reports/test-report.html",
        "pageTitle": "Automation Test with askui",
        "includeFailureMsg": true
      }
    ],
  ],
};

export default config;
Again, refer to the official README to see more options for the configuration.
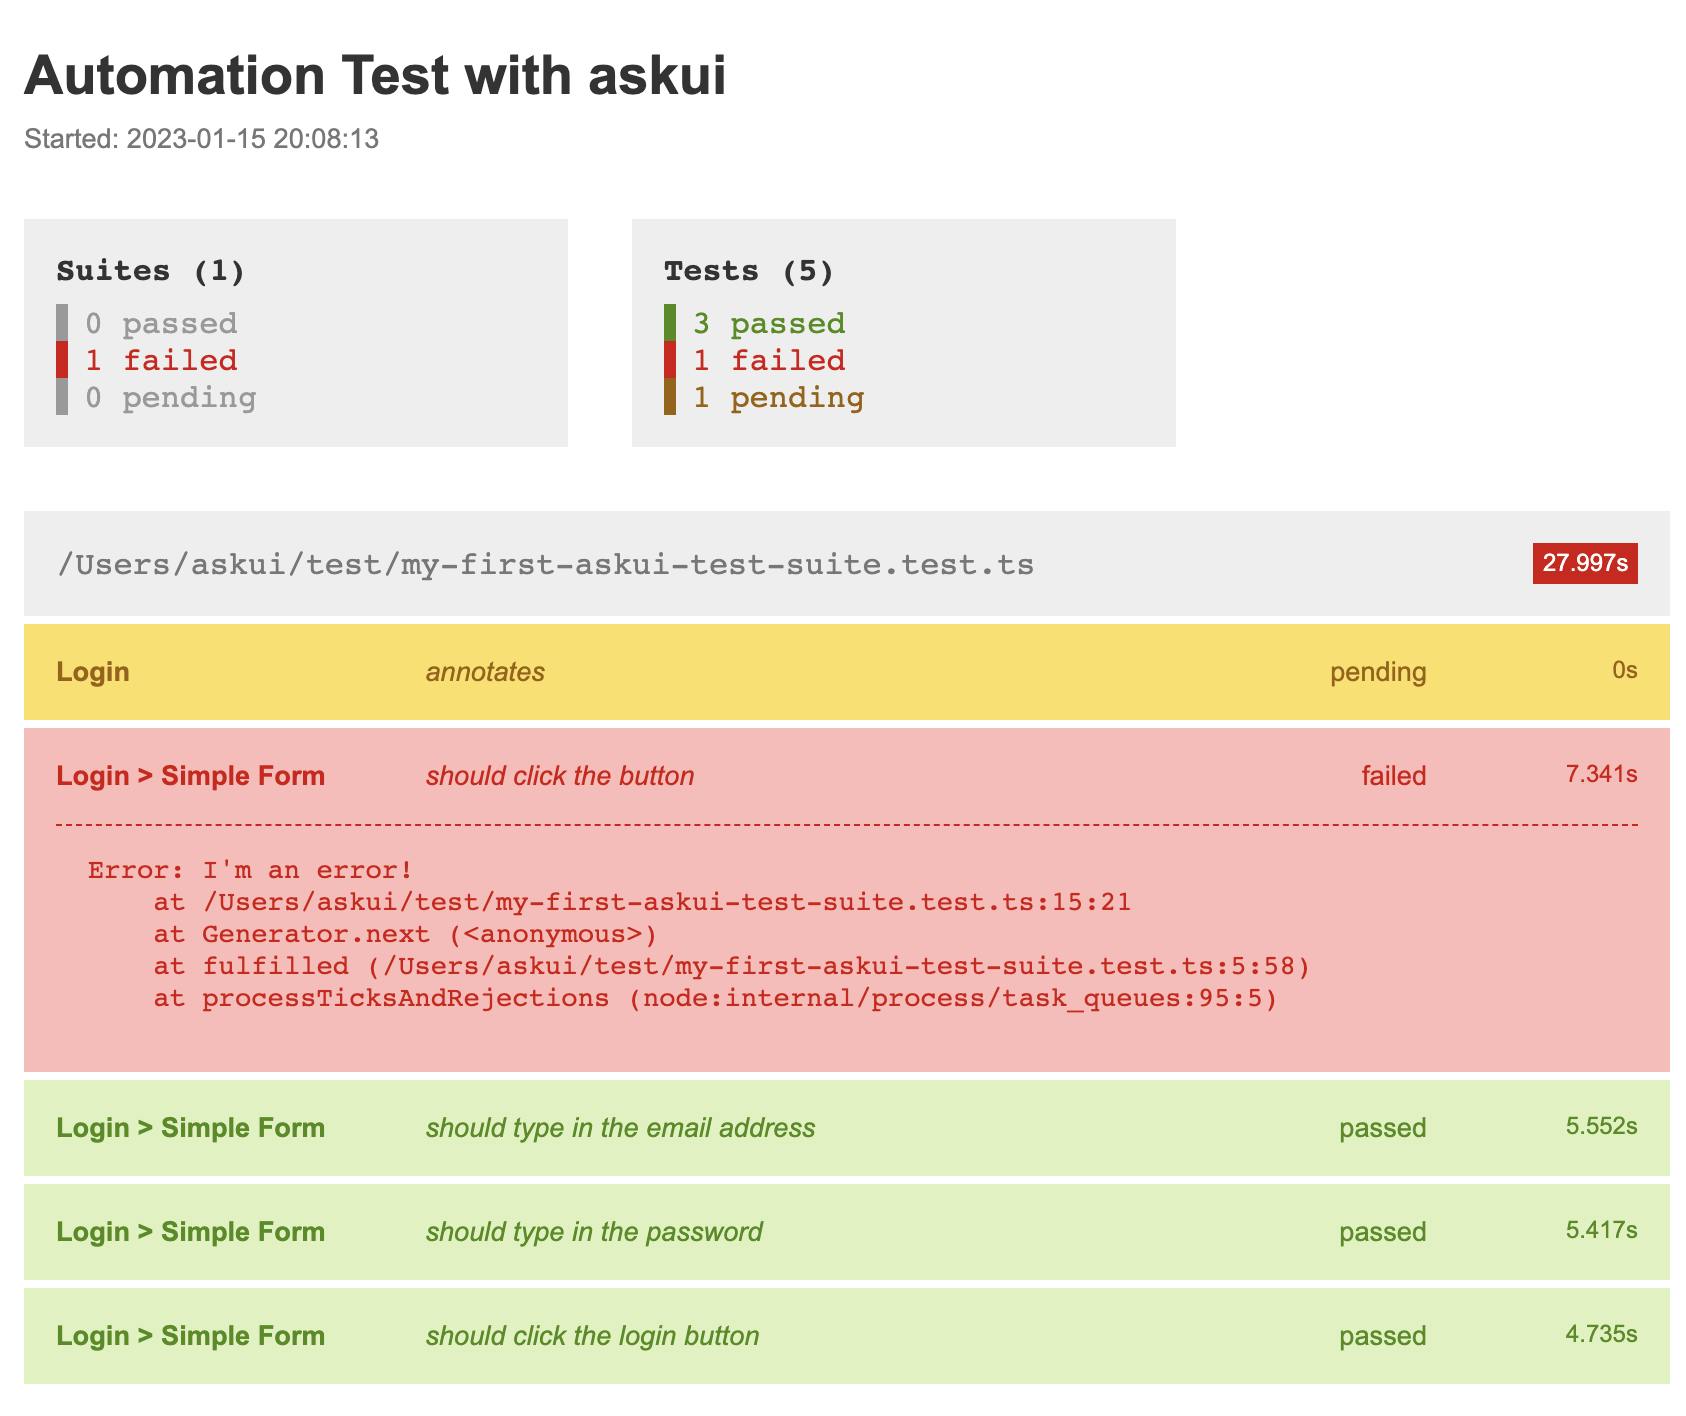
Then let's try to run the test suite again, but for the sake of testing the new reporter, let's make a test step to fail.
Insert this line within any test step in the test code:
    //... some test code

    throw new Error("I'm an error!");

    //... some test code
After running the test suite again, you will have an HTML file reports/test-report.html in your project directory. Open the HTML file in your web browser:
2.3. Using jest-html-reporters with askui
jest-html-reporters is another reporter that generates an HTML that summarizes the test result run within Jest. It might be similar to the above-mentioned reporter. But this one, jest-html-reporters, has a feature that can attach an image to the report, thus can assist your debugging process, especially for UI tests.
Run the command below to install the jest-html-reporter:
npm i jest-html-reporters
Now let's configure the reporter in jest.config.ts:
import type { Config } from '@jest/types';

const config: Config.InitialOptions = {
  preset: 'ts-jest',
  testEnvironment: 'node',
  setupFilesAfterEnv: ['./helper/jest.setup.ts'],
  sandboxInjectedGlobals: [
    'Math',
  ],
  "reporters": [
    "default",
    ["jest-html-reporters", {
      "publicPath": "./html-report",
      "filename": "report.html",
      "openReport": true,
      "expand": true,
      "pageTitle": "My Test Report",
    }]
  ]
};

export default config;
The options used in this configuration are:
"publicPath": The basepath for the saved report file as a string.
"filename": The file name for the saved report file as a string.
"openReport": If true, it will open the generated HTML report after the test run is finished.
"expand": If true, it will expand all the dropdown list in the table contained in the report
"pageTitle": The header title for the HTML report.
The options used in the above configuration are those I found useful for most of the test cases. But since there are more options available, check out the official doc if you feel keen to use it.
The feature of the jest-html-reporters that could be nicely combined with askui is the feature to attach images to the report, since askui, as a UI test automation tool, functions on top of the screenshot of the given display.
To use this feature, we import two helper functions from the reporter's package:
// Add this line to the top of the test code
import { addAttach, addMsg } from 'jest-html-reporters/helper';
Here is an example of how to use this feature with askui. We will attach a screenshot of the test step to the report:
import { aui } from './helper/jest.setup';
import { addAttach, addMsg } from 'jest-html-reporters/helper';

describe('Login',()=>{
  describe('Simple Form',()=>{
    it('should click the button',async ()=>{

      // Frist, get all the information from the annotation
      // This will also save an interactive HTML file to the 'report/' folder
      const annotation = await aui.annotate();

      // The screenshot is contained as a string in 'base64' format
      // Create a buffer with the base64 image
      let buf = Buffer.from(annotation.image.split('base64,')[1], 'base64');

      // Attach the image to the test report.
      await addAttach({
          attach: buf,
          description: '',
      });

      // We filter only the text elements, and add it to the reporter
      const textonly = annotation.detected_elements.filter((e) => e.name=="text");

      // Attach the detected text elements to the reporter
      await addMsg({
          message: JSON.stringify(textonly, undefined, '\t'),
          context:''
      });

      await aui.moveMouseTo().button().contains().text().withText('Simple Form Auth').exec();
      await aui.mouseLeftClick().exec(); // This first click is to get the focus on the test app
      await aui.mouseLeftClick().exec(); // Thereafter, we click the button
    });
  });
});
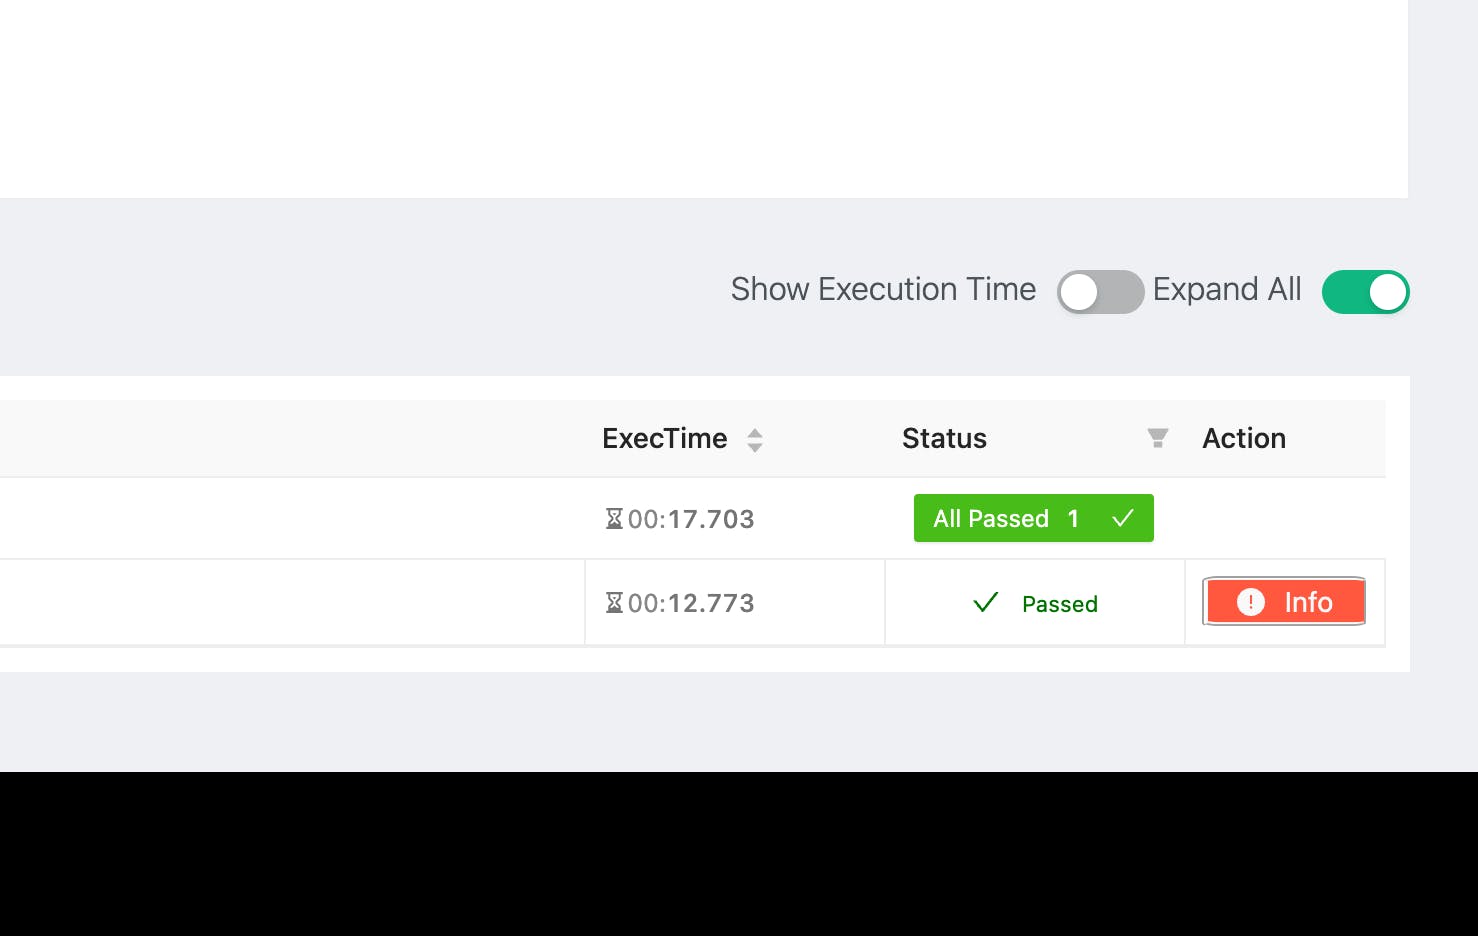
After running this test code, your web browser will open and show the generated report. Click on the Info button on the right end of the table:
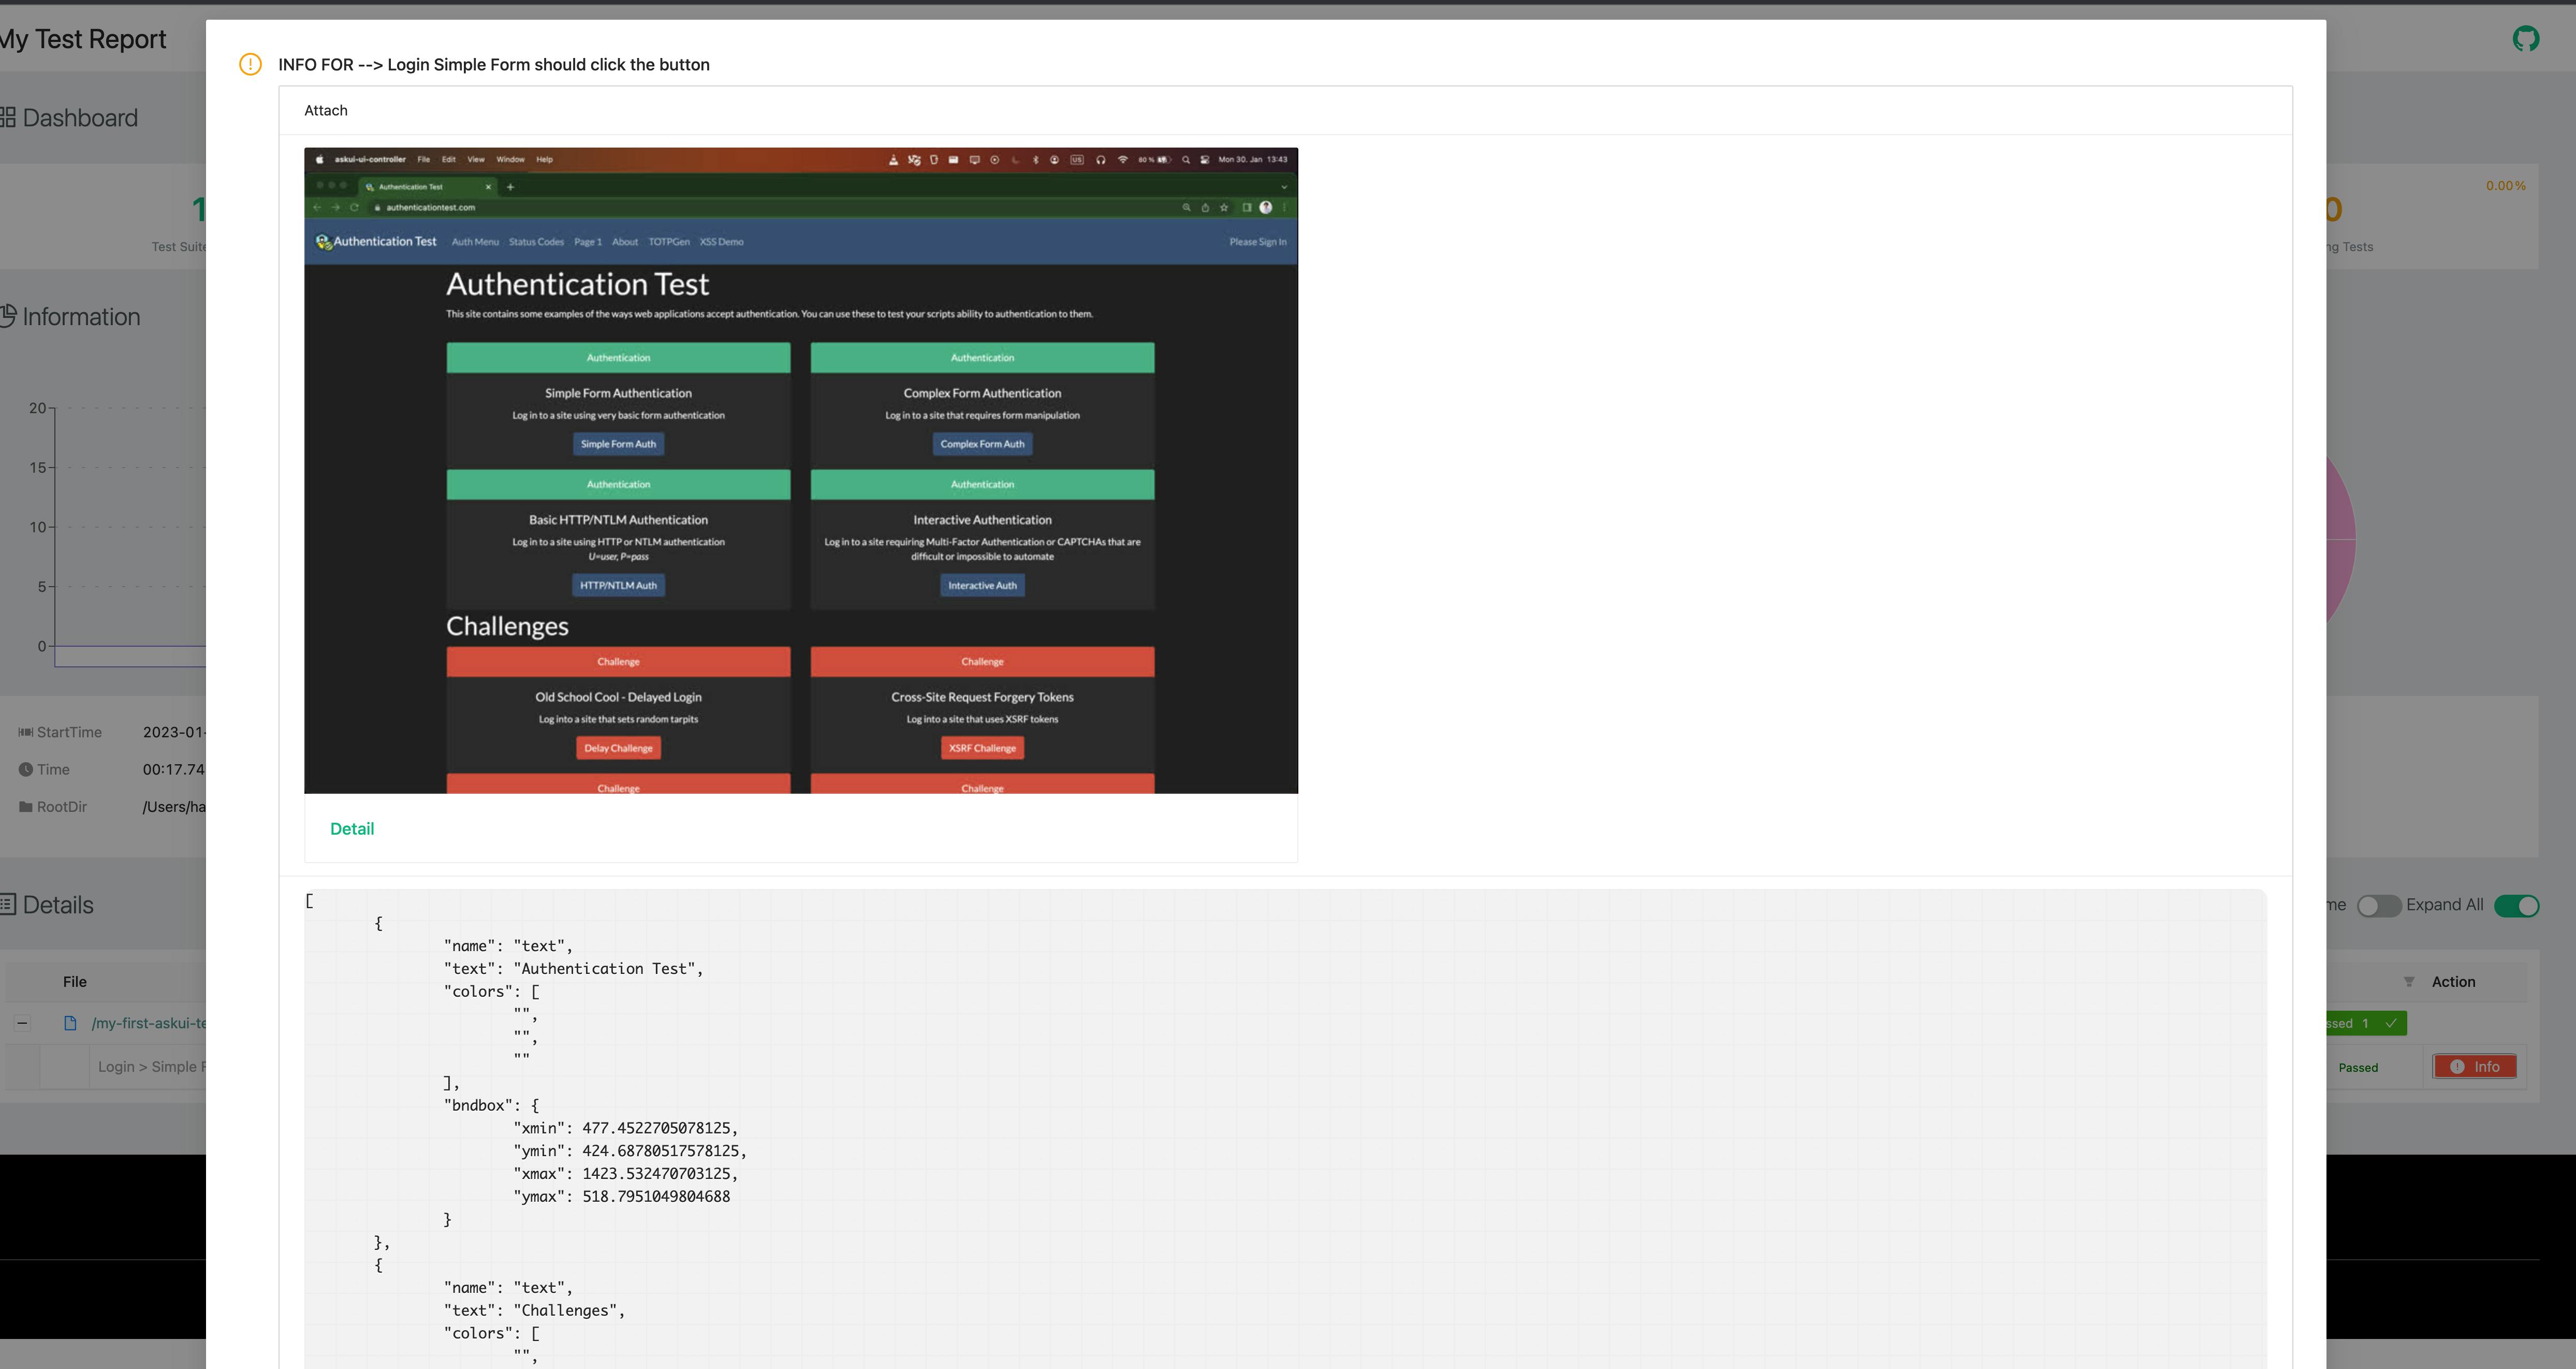
It will show the attached image beside the text elements we've added:
3. Conclusion
Although we covered only a few ready-made jest reporters in this article, reporter in Jest is fully configurable and customizable. To properly configure the testing pipeline, you could wish to have a custom reporter that fits nicely into your pipeline. As askui is a well-suited Typescript Library, combining it with Jest and proper reporters can become a huge benefit to scaffolding robust test automation.
If you got any issues while following this tutorial, don't hesitate to ask our Discord Community!